When it comes to pouring concrete in Ontario, there’s no one-size-fits-all approach. Between the fluctuating seasonal weather, mix variations, jobsite constraints, and equipment requirements, every project needs careful planning. Whether you’re a GC working on a subdivision or a homeowner laying a backyard slab, following the right process from prep to pour is the difference between a durable finish and a costly redo.
In this article, we’ll walk you through everything we’ve learned at Premier Concrete Pumping after hundreds of pours across Ontario — from Mississauga to Orillia, Toronto to Tiny. You’ll learn how to plan your pour, avoid weather-related issues, choose the right mix and pump, and work smarter with your concrete supplier and pumping crew.
1. Understand the Ontario Climate Challenges
Concrete behaves differently in Ontario than it might in more stable climates. We deal with hot summers, humid days, freeze-thaw cycles, and frigid winters.
That means your pour plan needs to be seasonally specific:
-
In summer: fast evaporation and high concrete temperatures lead to rapid set times, surface shrinkage, and cracking.
-
In winter: cold ground and sub-zero air temperatures can cause freezing, improper curing, and brittle pours.
Always plan your concrete placement based on a 7-day temperature window, not just the day of the pour.
2. Prioritize Site Access and Staging
At Premier Concrete Pumping, we’ve seen projects fail before the pour even begins—just from poor site prep.
Key questions to ask before the pour:
-
Is the staging area for the pump truck level and stable?
-
Can outriggers be fully extended?
-
What’s the reach to the furthest point of the pour?
-
Are there power lines or trees blocking boom extension?
-
Are line routes clear, or are we running hoses through doorways, over walls, or under scaffolding?
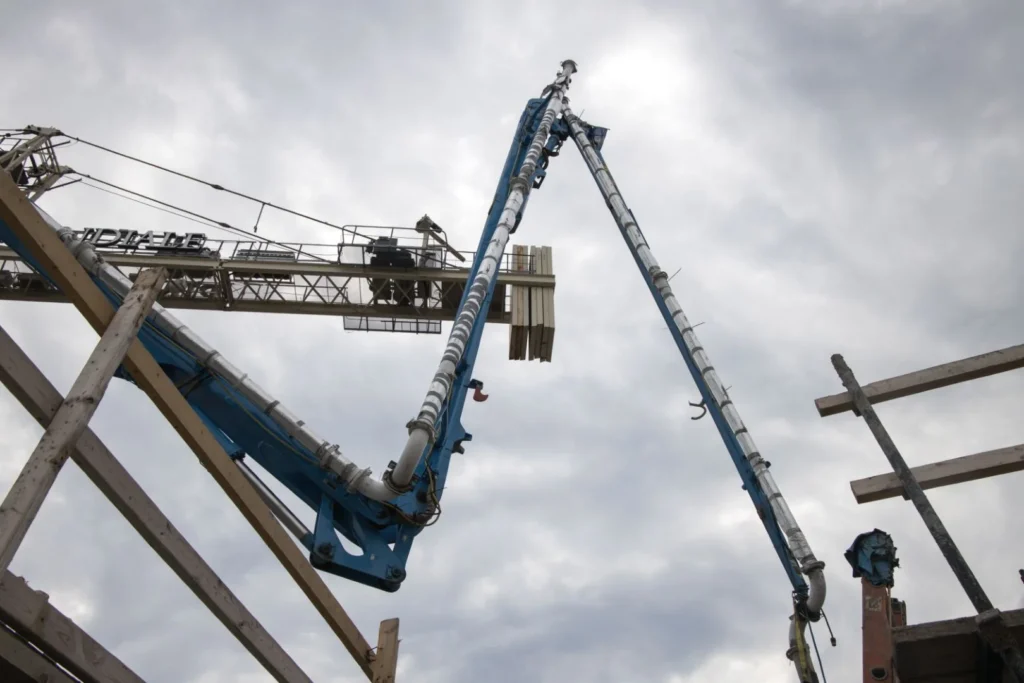
Site-specific planning determines whether we send a 36M boom pump or a 3” line pump. Learn more about our equipment options here.
3. Choose the Right Pump and Hose Size
One of the most overlooked issues in Ontario pours is choosing a pump/hose that doesn’t match the concrete mix.
We break it down like this:
-
2” line: No aggregate or slurry mixes only
-
3” line: 10mm max aggregate
-
4” line: 20mm max aggregate (standard for slabs and walls)
Using a 3” hose with a 20mm mix? You’re likely getting a jam mid-pour.
We recommend matching maximum aggregate size to the pump line diameter, then adjusting mix design accordingly.
4. Mix Design: Work With Your Supplier
Ontario mixes vary greatly depending on application and weather. Make sure your mix is:
-
Consistent with hose size
-
Low slump for vertical applications
-
Accelerated in winter
-
Retarded in summer to slow the set time
We’ve had customers call in asking why the boom is clogging—only to realize the site-mixed concrete had rock too large for the line. Communicate early with both your supplier and your pumping crew.
5. Communication Between GC, Finisher, Supplier, and Pumper
Clear communication between all parties is the secret to a great pour. We recommend a Pre-Pour Checklist:
-
Where is the pump parking?
-
What boom or hose length is required?
-
Are finishing crews ready?
-
Do we need additives for hot or cold weather?
-
Will you be using mesh, rebar, or radiant heating in the pour?
At Premier, we always walk through this checklist with clients before dispatching a unit. It saves time, money, and prevents last-minute jobsite chaos.
6. Best Practices for Hot Weather Concrete Pours
When temperatures climb over 30°C, concrete hydration happens too fast. The result? Cold joints, surface cracks, and poor long-term strength.
Here’s what to do:
-
Use cold water or ice in the mix
-
Add set retarders if needed
-
Avoid pouring between 12–4PM
-
Keep concrete shaded during delivery and staging
-
Wet the sub-grade and formwork prior to placement
-
Use fog sprays or wet burlap to prevent moisture loss
-
Place and finish quickly to avoid surface flash setting
We also recommend having multiple finishers on site to manage quick-set surfaces in hot weather.
7. Best Practices for Cold Weather Concrete Pours
Below 5°C? It’s time to activate your winter plan. Freezing concrete will expand, crack, and lose all structural value.
Use these strategies:
-
Use heated water and accelerators in your mix
-
Never pour on frozen ground — thaw with ground heaters
-
Maintain curing temperatures >5°C for 48–72 hours
-
Use insulated blankets, tents, or heaters
-
Air-entrain your mix to prevent internal freeze damage
-
Avoid power troweling (can collapse entrained air voids)
One of our jobs in Tiny, Ontario, used heated enclosures and high-early mix to place a 4-foot foundation wall mid-winter with no issues.
8. Don’t Skip Curing – It’s Half the Battle
Proper curing is often ignored, yet it determines 50% of the final concrete strength.
Key Curing Tips:
-
Begin curing immediately after finishing
-
Keep concrete moist for at least 7 days
-
Use curing blankets in cold weather
-
Use water sprays or curing compound in hot weather
-
Prevent rapid moisture loss from wind and sun
Neglecting curing can lead to premature surface failure even if the pour was otherwise perfect.
9. Avoid These Common Mistakes
We’ve helped troubleshoot countless jobs gone wrong. Here are some of the most common mistakes:
-
Not matching hose size to aggregate size
-
Ordering too much slump in hot weather
-
Pouring too slowly with fast-set mixes
-
Not accounting for boom swing clearance
-
Finishing too early (leading to surface scaling)
-
Pouring over snow or frozen forms
Take a few minutes to walk your site and review your mix specs—it will save you hours in repairs later.
10. Trust Your Concrete Pump Operator
A skilled operator does more than move concrete.
We:
-
Inspect site for hazards
-
Guide boom or hose placement
-
Use wall snakes or pipe reducers for tricky pours
-
Control pour speed to avoid blowing forms
-
Use vibrators to eliminate air pockets
-
Spot voids or uneven flow patterns during the pour
At Premier Concrete Pumping, our team brings decades of hands-on experience across commercial, residential, and ICI projects in Ontario.
Real-World Example: ICF Walls in Simcoe County
We partner with ICF Home builders across Oro Medonte and Orillia, supplying 20m–40m boom pumps for vertical wall pours.
Our best practices on those jobs include:
-
Slow pour rates to prevent blowing out foam forms
-
Use of wall snakes to drop line down 12+ feet inside ICF cavities
-
Use of concrete vibrators to fill voids at bottom of forms
-
Continuous communication with the forming crew to avoid overpressuring
That’s the level of execution it takes to pour concrete properly in Ontario.
11. Have a Contingency Plan
Weather delays. Traffic. Supplier mix-ups.
Build-in buffer time and have a plan if something goes wrong:
-
Have a backup pump or crew on standby
-
Confirm mix order 24 hours in advance
-
Walk the site with the crew before pour day
-
Let your finishers know of expected pour times
Final Word: Every Pour is a Team Sport
The best contractors know that a smooth pour isn’t just about ordering concrete. It’s about collaboration, communication, and doing the little things right.
At Premier Concrete Pumping, we’ve worked on everything from back patios to high-rise podium decks—and we bring these best practices to every site we visit.
If you’re planning a concrete pour in Toronto, Hamilton, Simcoe County, or anywhere in Southern Ontario, we’re ready to help. Let us guide you through pump selection, site staging, weather planning, and the pour itself.
Need help choosing the right pump?
Check out our equipment guide here. If you’re looking to work with us, contact us!